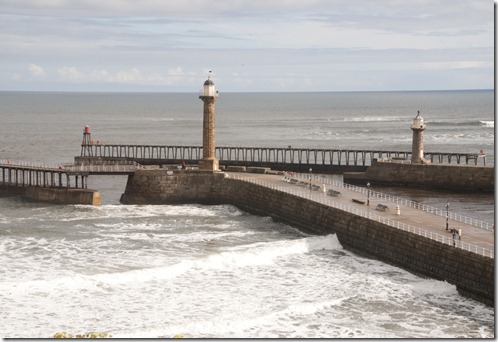
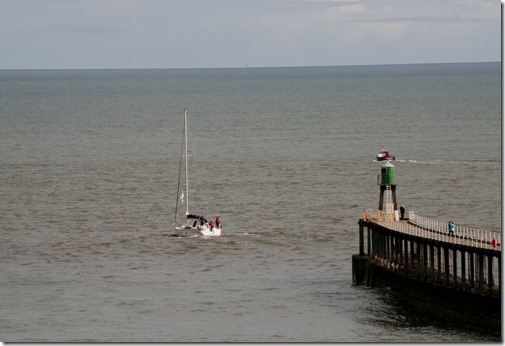
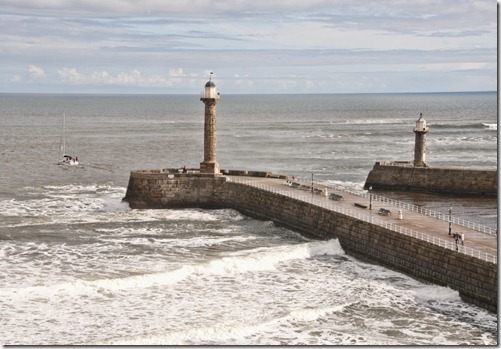
For this exercise I took two images – one of Whitby piers and one of a yacht heading out to sea.
My plan was to remove the pier extensions, to take them back to the original pier length (pre-1913) and place the yacht in the image for some interest and realism – it would also take the focus away from any obvious changes to the piers.
Original piers image
I copied the image into a second layer and used this layer for the alterations – this left the original as a reference and recovery tool if required.
The clone tool was the main implement for this task, selecting different parts of the sea to paint out the unwanted parts of the image. Using different sized tools for the more delicate parts and selecting parts from the main image to clone – for instance the waves coming round the side of the West pier were used to create a similar effect on the East pier. I then used a breaking wave from the pier wall, to break over the end of the West pier – also the West pier castellation were copied from parts of the main pier wall.
To clone the areas around the West pier handrails I zoomed in and used a small clone tool with the shift key to create straight cloned lines along the rails.
Where it was difficult to get sharp lines – for instance on the East lighthouse – I used a layer mask to bring back the straight sides of the lighthouse from the lower layer.
I selected the yacht using the polygonal lasso tool and dragged it onto the altered image, where I resized it and positioned it where I considered it should be. I used a layer mask to remove the sea from the yacht image as it was a sharper image than that of the pier – again I used the shift command with a small brush to work around the rigging. I left the yacht’s wake in place as much as I could using a lower opacity brush as I worked this part in the layer mask.
I then stamped up the layers and used the blur tool at 50% strength, on the top layer around the yacht – this part of the image was too sharp for the rest of the scene, and some blur blended it in. When I was satisfied with the result I flattened the layers and saved the final image.
I don’t have any problem regarding these changes. I set out to make a new image which won’t be used for any serious purpose – it’s just a fun image. I suppose it could be used as a spoof, but that would be obvious.
I think the objective of creating a believable image has been achieved and that’s all that is required.


No comments:
Post a Comment