Steve's Progress with OCA

This blog is for the learning log for Steve Estill's progress in the study for the BA in Photography with OCA.

The first Module was Photography 1 - The Art Of Photography.
The second module was Photography 1 - Digital Photographic Practice - started in January 2012 and finished in May
For the third module see the new blog at http://moreocapnp.blogspot.co.uk/

Tuesday 31 January 2012

Reference Material

I’ve found the following books and website useful in this part of the course:

The Digital SLR Handbook – Michael Freeman. 2005. ISBN- 10 1-904705-36-7

· This has a really good section on workflow, including histograms, Colour management (including profiling, monitor and print calibration) etc. I know it’s getting a little dated now, but it’s all still valid.

Michael Freeman’s 101 Top Digital Photography Tips. 2008. ISBN- 10 1-905814-34-8

· Similar to the above, but using quick reference pages with the author’s tips.

http://www.luminous-landscape.com/techniques/process.shtml A useful processing workflow tutorial for Photoshop 7. Nothing that isn’t covered in the Digital SLR Handbook (above), but a slightly different slant with cropping very early in the sequence.

Exercise 1.04 Editing

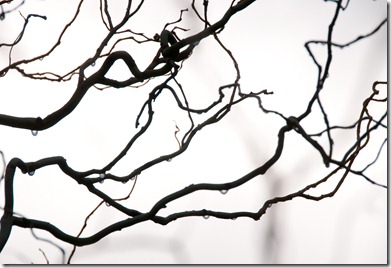
A still frosty morning provided an excellent opportunity for some macro photography in the garden – an early start to catch it before the sun melted the ice.

After allowing the camera and lens to cool down to the ambient temperature I set up the camera in aperture priority, on self-timer and tripod mounted. It was set up for three-frame bracketing, so I could use HDR if required and also to be able to select the optimum images for the light conditions – still quite dull, but the whiteness of the frost had a significant impact on the exposure. I varied the aperture to give both long and short depth of field.

Initially I had 84 images to download, using Lightroom and saving into ‘Photographs’ > Downloads > 2012 > 2012-01-29 with the prefix of ‘frost’

In Lightroom I created a new Collection Set under OCA > DPP > 1.04 Editing.

I created a collection in this set – 1 As Downloaded – into which I referenced all the imported images.

Step 1 – The technical edit

I selected all the images in this collection and created another collection – 2 Technical – into which all the selected images were imported. I then removed images from this collection which were obviously technically poor – mainly due to under / over exposure because of the bracketing, but also because of some slight movement of the plants due to a light breeze which was developing. This technical edit reduced the number of images in the ‘technical’ collection to 37.

Step 2 – The selects

Selecting all the images in ‘2 Technical’ collection I created another collection ‘3 Selects’ into which all the selected images were imported. I ranked these remaining images using the ‘star’ system which made it easier to identify the poorer images – removing all images with a score below 1 reduced the number of images to 22.

Step 3 – The first selects

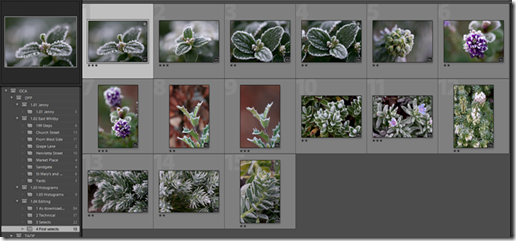
I selected all 22 images in this collection and created another collection – ‘4 First selects’ – into which all the selected images were imported. In this collection I removed the 1 star ranked images. These were marked down, in many cases by comparing them to similar images and scoring higher on the ‘preferred images’. In some instances the contrast didn’t make the image ‘buzz’ or I selected an image with less depth of field than one that showed more detail in the background. This reduced the number of images to 15 – all of which had star ratings of 2 or 3.

image

Step 4 – Group and review

Having had a break of 12 hours I’ve looked again at the selects / first selects and come back to the decisions I made originally.

I’d have to say that this is the system I’d devised and work through on most of my projects – It may not have been so strictly laid out and I didn’t make the different collections, but the workflow is just the same. In practice I’d delete the rejected images from the hard drive instead of retaining them in the ‘as downloaded or ‘technical’ collections.

Step 5 – A final choice

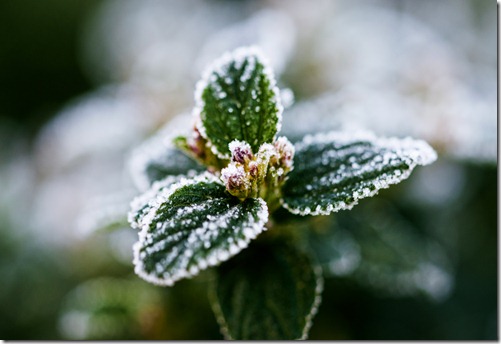
The ranking system in Lightroom makes it very easy to view just the images ranked as say ‘3 and above’ without creating new collections so selection becomes much easier. With this filter employed, the choice is reduced to five images, of which I think two stand out, as below:

The Ceanothus leaves form such an attractive triangle framing the ice particles round the developing buds.

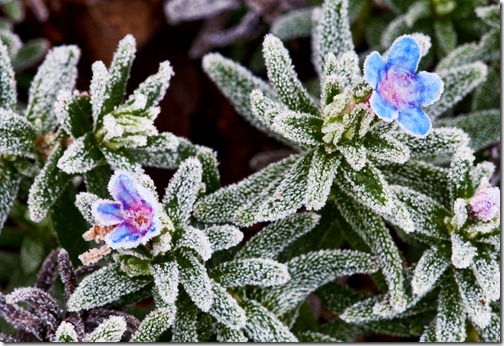
The Gentiana flowers really stand out in these conditions. It’s good to see some strong colour at this time of year too.

exercise 1.04 01 Ceanothus

Ceanothus

exercise 1.04 02 Gentiana

Gentiana

It’s been an exercise which didn’t teach me a great deal – apart from being too cocky with my lack of planning for the shooting – I’ll try harder for the assignment.

At least it’s confirmed that what I’ve been doing with my own developed workflow is acceptable. Maybe there’s hope for me yet!

Project - Editing

Project - Editing

Sunday 29 January 2012

Exercise 1.03 – Histogram

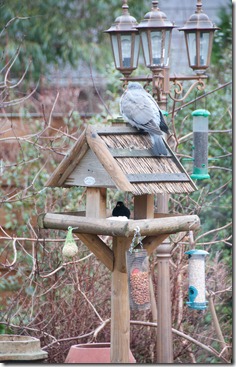
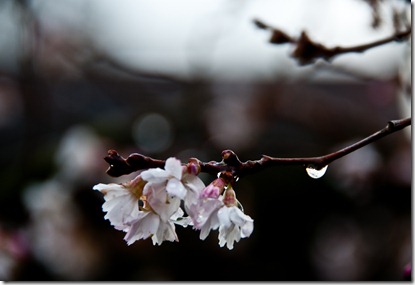
The following images were taken in our garden on a generally overcast day with long rain showers and occasional brighter spells. I used bracketing with 1 stop over / under exposure either side of the metered exposure.

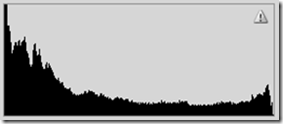
This first set has very low contrast, due to the overcast weather conditions.

exercise 1.03 01 low    image

Low Contrast Image – No exposure compensation

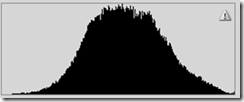
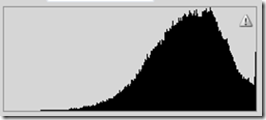
The first image shows the histogram image to be compressed into the centre of the graph – the black and white extremes are almost non-existent.

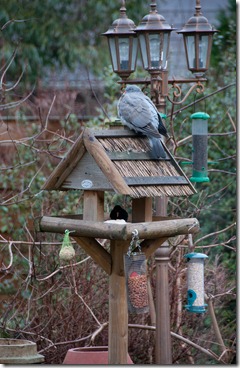
exercise 1.03 02 low    image

Low Contrast Image – 1 stop under exposed

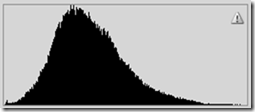
With the image under exposed by one stop, the darkness in the image is reflected in the histogram, with the graph moved towards the black, left hand side. It’s interesting to see that detail in the lighter areas (image and histogram) are retained.

exercise 1.03 03 low    image

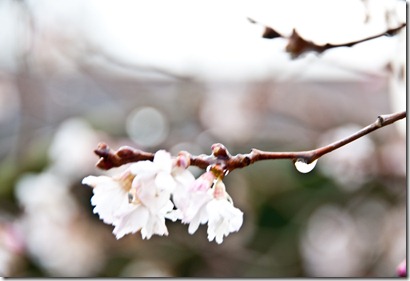
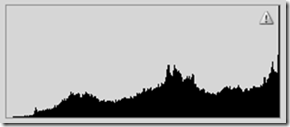
Low Contrast Image – 1 stop over exposed

In this image the detail is being lost across the image. In the light areas the definition is being lost – reflected in the histogram where the lighter pixels are starting to pile up at the right of the graph.

As the sky begins to lighten the contrast increases, to the stage where an average image can be taken.

exercise 1.03 04 average

image

Average Contrast Image – No exposure compensation

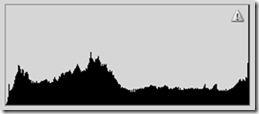
Apart from the white spike at the far right of the graph, the histogram is generally flat across the whole range.

exercise 1.03 05 average

image

Average Contrast Image – One stop under exposed

As expected, the graph now shows much more in the darker areas, to the degree that some shadow clipping is shown where the blacks disappear above the top of the range.

I think I prefer this setting for this particular image.

exercise 1.03 06 average

image

Average Contrast Image – One stop over exposed

The graph moves to the right as the image gets brighter, to the extent that white clipping is now occurring. The detail is now lost in the highlight areas.

exercise 1.03 07 high

image

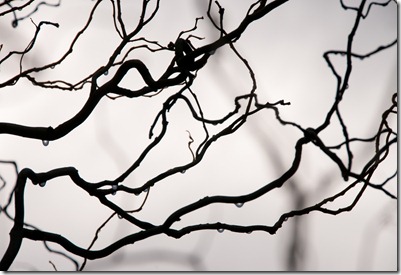
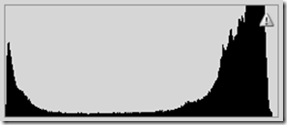
High Contrast Image – No exposure compensation

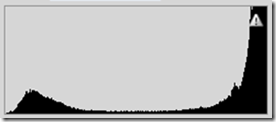
Shooting into the light, this image is almost Black and White, as reflected in the histogram which shows very little in the middle of the graph – all the action is at the extremes. The white areas have some clipping, but I feel the camera’s exposure looks right in the image, where no burn out or clipping is evident.

exercise 1.03 08 high

image

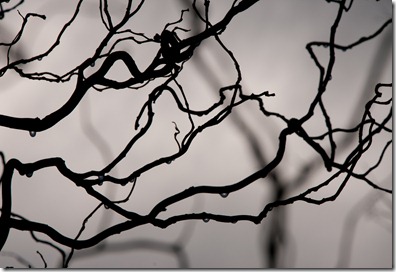
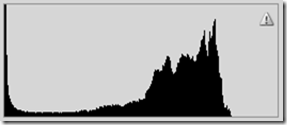
High Contrast Image – One stop under exposed

There is now some clipping of the shadows. The light areas are now too dark for my liking, but at least there’s no clipping of the highlights! The graph has moved over to the left hand side.

exercise 1.03 09 high

image

High Contrast Image – One stop over exposed

The clipping of the highlights is now severe, as can be seen at the right hand side of the histogram. This is now almost entirely Black and White as the intermediate shades have all but disappeared.

The differences between the low, average and high contrast histograms are evident in this exercise. Also the higher and lower exposures are shown by the lateral shift of the graph. It’s useful to be able to interpret the amount of contrast in an image in camera, while alterations to settings can still be made.

Project - Histograms

Saturday 28 January 2012

Exercise 1.02 – Your own workflow 2

Planning for an open ended project seems at first to be a bit daunting, but I suppose it’s something I’ve been doing for years – taking off to look for fungi in the forest would mean selecting all the required equipment and just going to see what can be found. So there’s some planning for whatever I may come across. The post shooting plan will be almost the same as for the first exercise, except the additional grouping of collections for the various aspects of the project.

I’ve decided to have a closer look at the streets, architecture and buildings around the older parts of East Whitby. There are the obvious buildings like the Town Hall, the Abbey and St Mary’s church, but what of all the others – converted chapels, inns, restaurants, shops, older cottages – there’s a real wealth to look at here. The streets and yards provide lots of interesting views too. This project is so open ended that it could take several days / weeks / months / a lifetime to complete. I propose to just make an introduction to it, rather than complete the whole task.

The plan would be like this:

Shooting / reviewing / deleting in field

Downloading to computer

Reviewing / deleting / selecting groups for Lightroom categories

Selecting images for subsequent processing

Processing in Lightroom and exporting images to ‘in progress’ folder

Process selected images in Photoshop

Name, save and file the final images in their various folders

For the shooting:

I’ll need:

· Comfortable, water resistant clothing, including boots. A waterproof cover for the cameras. My camera rucksack. Cleaning / drying cloths for the cameras and lenses.

· The images I could expect may be:

o Detail of buildings taken from across the harbor, so I’ll take the D200 with the long telephoto – I’ll leave this set up on the Slik tripod. Details in the buildings can also be picked out with this set-up. A higher ISO may be required to allow faster shutter speeds and reduce the effects of camera shake.

o Panoramas of areas of the town – the 18-200 mm VR on the D300s and the 10-20 mm lens too. The Manfrotto tripod will be best for this as it can be rotated for ground level work. I’ll use bracketing for possible use with HDR and stay with ISO 200 unless the lighting deteriorates. Images for stitching will be taken in the portrait format. For a great deal of the shoot I’ll probably use the 18 – 200 mm on the D300s hand held.

· Other equipment – I’ll need spare camera battery (make sure the existing batteries are fully charged)

The plan:

I’ll start on the West Cliff to take images of the East side. I’ll take a series of images to create a panorama and others where the long lens will pick out points of interest from a higher viewpoint.

When I’ve taken this initial set I’ll go down to the harbourside and cross to the East for the more detailed images. I’ll walk along Sandgate, to Church Street and Henrietta Street before climbing the 199 steps for images of St Mary’s and the Abbey (from outside as the grounds won’t be open at this time of year) then views above the old town before going back down the steps to Church Street and on to Grape Lane before heading back to the West side. I would think I’ll need about 3 hours for this.

As it’s unsure what I’ll find or how many images I’ll be taking, there’s a possibility that I’ll be reviewing the ones I’ve taken while still in the field, so any poor shots can be deleted before I get home. It’s also an opportunity to see how images look and make any necessary adjustments for a retake. There shouldn’t be any problem with memory space – the D200 has 8GB which gives around 470 RAW images and the D300s has two 16GB cards allowing 1540 RAW images, but deleting any unwanted images in the field will be an advantage when I get home.

Downloading:

· While it’s possible to select individual or groups of images for downloading, I find it easier to download one camera at a time and file them under their various categories in Lightroom before moving on to the next camera – it would be best to download the D200 first as I anticipate having many more images on the D300s, so the downloading process will be quicker and more convenient leaving the D300s to last. I’ll give the prefix of ‘Whitby East’ for both sets of images with keywords ‘OCA, DPP, D200 / D300s’ initially. RAW files will then have the name ‘Whitby East-XXXX.NEF’ and be stored in the dated folder on 1TB external hard drive.

Initial reviewing:

· Deletion of unwanted images from the disc before categorizing is easily done in Lightroom. They are then deleted from the dated folder

Selecting:

· The files will be classified in groups and collections created in Lightroom to suit. The images to be kept for further editing can be ranked and placed in the collections. Further keywords can be added if required. Any which are still not required can be deleted. It’s easier to do this before the next camera is downloaded, otherwise ‘all photographs’ must be selected to enable deletion from the disc and I’ve got thousands!

Processing:

· When images have been downloaded, reviewed, classified and ranked they can be processed in Lightroom if required, before exporting them into ‘in progress’ folders as TIFF files. The images can be renamed with a new prefix – e.g. ‘exercise 1.02’ which can then be easily accessed from Photoshop.

· In Photoshop the files can be further processed and resized as required.

· The individual processed images are then filed and renamed (e.g. exercise 1.02 04 Kipper house) in their respective ‘print’ folders as Tiff, Hi res JPEG and Low Res JPEG as required.

In Practice

Shooting:

Equipment:

· The weather improved suddenly, with a forecast of only one day without significant rain, so off I went. I had a rethink about the tripods, as I didn’t fancy carrying two around town (and especially up and down the steps, so I fitted the Slik head on the Manfrotto tripod and changed the mounting plate on the D300s, so both cameras could be mounted on the same tripod.

The plan:

Deviations:

· I took a sequence of six images with the 18-200 mm lens on the D300s, to be used for stitching together a panorama, rather than use the 10-20 mm on a single image, so I wouldn’t get the distortion in panorama.

· After taking the images from the West Cliff I decided that I probably wouldn’t need the long lens again, so I left it, with the camera rucksack, in the car. I could travel light around town with one camera and tripod - the 10-20 mm lens, cleaning cloths and spare battery would sit easily in my coat pocket.

· I took three bracketed images of each scene for the whole of the shoot, as I intend to use some of them in future work.

· I deviated from the original plan as I saw interesting images on my walk – taking images of railings, seats etc. (I still think they’re part of the architecture) and using the 10-20 mm lens more than I’d planned, to create distortion in some of the buildings.

Otherwise the plan went pretty well as I’d foreseen. The timing was about right. I edited out some images where I’d obviously got bad lighting, bad angles, camera shake, people walking in front of me etc. as I progressed, making the computer editing easier. I still came home with 294 images – 98 bracketed scenes.

Downloading / selecting:

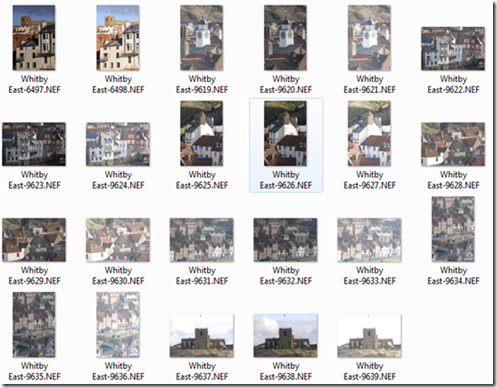
As planned, I downloaded the D200 first – this only contained 27 images. They were filed on the Photographs external drive under Downloads > 2012 > 2012-01-25 with the prefix ‘Whitby East’ They were given keywords of OCA, DPP, D200
image

Six frames were deleted, using Lightroom – Duplicated scenes deleted in favour of the better ones.

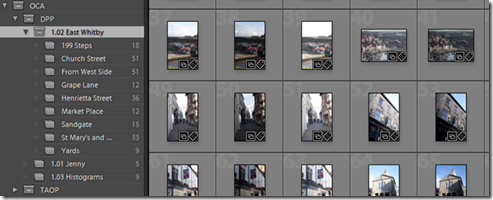
A collection was created in Lightroom, under OCA > DPP > 1.02 East Whitby > From West Side into which these images were placed.

The D300s images were then downloaded, with the same ‘Whitby East’ prefix, into the same folder as those from the D200. These had the keywords ‘OCA DPP D300s’. An initial edit was again carried out, removing images which were duplicated or had obvious technical faults.

Further collections were created under the OCA > DPP > ‘1.02 East Whitby’ Collection Set, using mainly street names and the remaining images placed in their appropriate folders.
image

All these images were also placed in the ‘Whitby’ collection – separate from the OCA collection. This would then enable removing them from the DPP Lightroom collection, but still retaining them for other work if required.

The next step was ranking. This was done in each of the 1.02 East Whitby collections, using the star system. This involves a lot closer scrutiny of the images, ranking each image individually. If one image ranked as one star or above, then its related bracketed images were also ranked the same. Any which didn’t make one star were left unranked.

When all the collections had been ranked, I selected ‘Previous import’ and selected all images with ranking below one star, selected them all (Ctrl A) and deleted them from the disc. This reduced the number by a further 48.

The images to be used for the panorama only required the uncompensated images, so only the first image of each bracketed set was retained. This reduced the number by a further 10.

image

From here it’s the selection of images for further processing. Of the remaining images I’ll only need one image from each bracketed set, so removing all the under / over exposed images from the collections reduced the total to 65 images – they’re still available on the hard drive and in the Lightroom ‘Whitby’ collection if required.

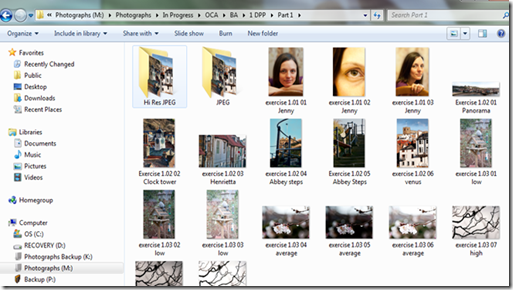
From here the images can be processed in the ‘Develop’ mode and / or saved to the working ‘In progress’ folder. A selection have been saved and processed into the ‘Photographs’ > In Progress > OCA > BA > 1 DPP > Part 1 folder
image

I think that’s about as far as this exercise should go, as I’ve demonstrated how I move through the required stages from Shooting, through downloading and saving images to the initial editing and saving to the ‘In Progress’ folders. I include some of the images I processed for interest:

Exercise 1.02 01 Panorama

Panorama taken from West Cliff using 6 images, stitched in Photoshop
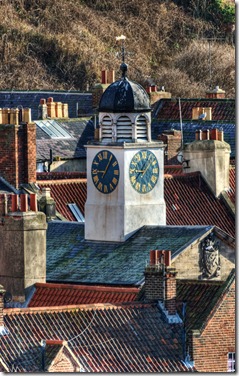
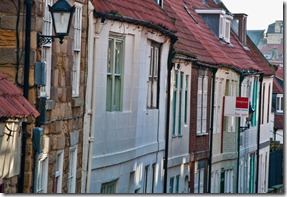
Exercise 1.02 02 Clock tower  Exercise 1.02 03 Henrietta Street

      Town Hall Clock                                 Henrietta Street Cottages

Taken from West Cliff with long lens            Interesting gutter lines!
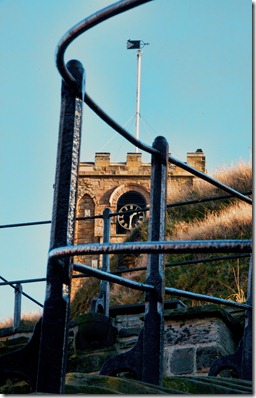
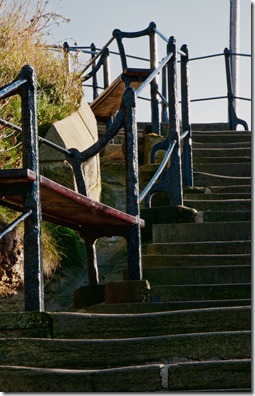
Exercise 1.02 04 Abbey Steps    Exercise 1.02 05 Abbey Steps

Two views of the 199 Steps

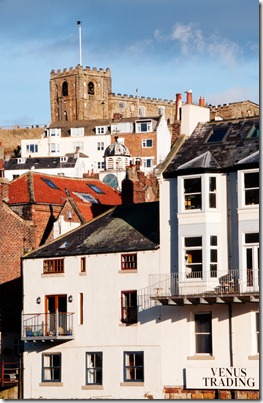
Exercise 1.02 06 Venus

St Mary’s Church from the bridge

It’s been an interesting exercise. I didn’t learn a great deal, but it’s shown me that I’ve been doing things more or less correctly with my personal workflow. It’s shown me more about the planning of the actual shoot, in that you’ve got to plan for the unexpected, so don’t be tied to one lens. Also it’s not unreasonable to forget about using equipment that you’ve chosen if it’s going to cause discomfort – leave it in the car if it’s done its job!
Friday 20 January 2012

Exercise 1.01 – Your own workflow 1


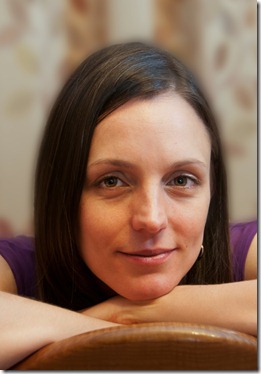
This exercise presented itself earlier than I’d expected due to a visit from our son and daughter in law. I jumped in with not enough planning for the shooting, with obvious results. I think this is still valid for the exercise as the workflow is OK but it shows what needs to be better planned and better prepared.

My workflow plan was as follows:

  • Shooting – Plan equipment and an alternative
  • Download to computer – Use Lightroom for naming files / folder
  • Review images – Delete any images which will not be used.
  • Select best images – Use Lightroom ranking system
  • Export images to working folder – Rename files from Lightroom
  • Process selected images – Use Photoshop for editing
  • File finished images – Save / name images to ‘print’ folders from Photoshop

Shooting – I planned to use one of two options:

· In the garden with large shrubs as a backdrop if the weather was good.

· In the dining room with the patio door curtains drawn if the weather was unsuitable for the garden option.

With both options I planned to use fill flash with an additional beauty dish flash unit for side lighting.

Constraints / Techniques:

· Time would be restricted to around 30 minutes as they had to manage their travelling time between baby feeds and sleeping routine.

· I’d talk to Jenny about the purpose of the session and offer her copies of the files and prints if she wished.

· I wanted to try a variety of poses and also use the macro lens for ‘different’ portraits. I’d encourage her to change her expression to give us a better range of images.

· I’d use slow continuous shooting to capture the images while allowing the flash unit to recharge.

· I’d just received a creative lighting accessories kit for my digital flash and a remote wireless control for it – I’d had no time to practice, so it may be a problem, I planned to use both natural and flash lighting to cover both options.

Transferring / examining / selection / processing – I think I’ve got this pretty well covered using Adobe Lightroom for all my imaging imports.

The weather was against us for the garden due to a hard frost, so I drew the curtains over the dining room patio doors, left a chair for her comfort and set up the lighting

I tested the flash remote control and with Jenny’s agreement we went for it.

As we progressed with the shoot, it was obvious that the flash was too strong, so it was angled towards the wall. The majority of the session was completed without flash.

The positioning of the chair was significant, with Jenny feeling much more comfortable with it reversed. As she became more comfortable I changed to single frame shooting as she was more at ease to pose.

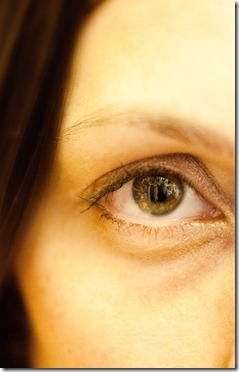
The poses we tried with her standing up were interesting. She’s not the tallest girl, but a straight on image made her legs look shorter – taken from a low angle her legs looked significantly longer. On later inspection it was clear that the light from the lounge widow was providing a line of brightness across her legs which made those images useless. This backlighting also made my reflected silhouette obvious in her eyes. That’s a significant thing to watch for.

So the shooting could have been much better planned and the equipment should have been better prepared. I’ve since sorted out the flash, using the CLS in camera to determine the strength of the remote flash, without an additional remote control.

Moving on to the rest of the workflow – this went well:

Transferring the images to the computer I do with the USB cable rather than unseat the memory card unnecessarily.

With the camera USB cable plugged into the computer and using the Lightroom Import dialogue screen, I prefixed the RAW files ‘Jenny’ followed by their original file number. I also used keywords of OCA and DPP. They would be filed in a folder on the external hard drive under the date taken.

The files were imported to Lightroom and copied to one of my external hard drives, under photographs > downloads > 2012. The camera was then disconnected and the memory card reformatted (standard practice).

Three days later and there’s a chance to look at the images using Lightroom. With 55 images to examine I deleted the obviously overblown images and ranked the better images using the star system. The starred images were then exported to the ‘in progress’ folder of the external drive under ‘OCA’ > ‘DPP’ > ‘Part 1’ with the prefix of ‘exercise 01’

image

This first pass was then further examined to reduce the selections to three, which were then tuned in Photoshop. The RAW images not required were deleted from the hard drive via Lightroom.

The final images were saved in 3 separate folders, as Tiff files, for better printing; High resolution JPEGs for the presentation; and lower resolution JPEGs for use on the blog / e-mailing.

image

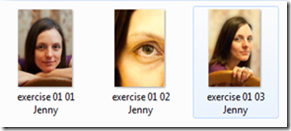
The images produced were:

exercise 01 01 Jenny  exercise 01 02 Jenny

exercise 01 03 Jenny

Apart from the lack of preparation for the shooting, I think the workflow worked pretty well. The fine detail of the work in Lightroom and Photoshop haven’t been mentioned here, but obviously Lightroom can be used for a great deal of the processing, before images are exported to the ‘in progress’ folder, if required.

For me, the main thing to learn from this exercise is that the planning and preparation for the shooting should be much better, taking into consideration things like:

· Getting conversant with equipment before it’s used

· Checking out where light may impinge on the set

· Avoiding my own reflection in the images.

It was also evident that Jenny got more relaxed as the session progressed, so it would be advantageous have extra time to put the model at ease and / or waste a few shots to show that it doesn’t really hurt!
All in all I quite enjoyed this exercise. It’s not a kind of Photography I’ve been comfortable with, but I’m pleasantly surprised by the results.

Project: A sequence of actions

Here we go again, starting Digital Photographic Practice. The Art of Photography is planned for assessment in July. I’ve prepared the presentation so now I can get moving with this module. Let’s go!

Photography 1 - Digital Photographic Practice

Friday 6 January 2012

Assignment 5–Applying the techniques of illustration and narrative

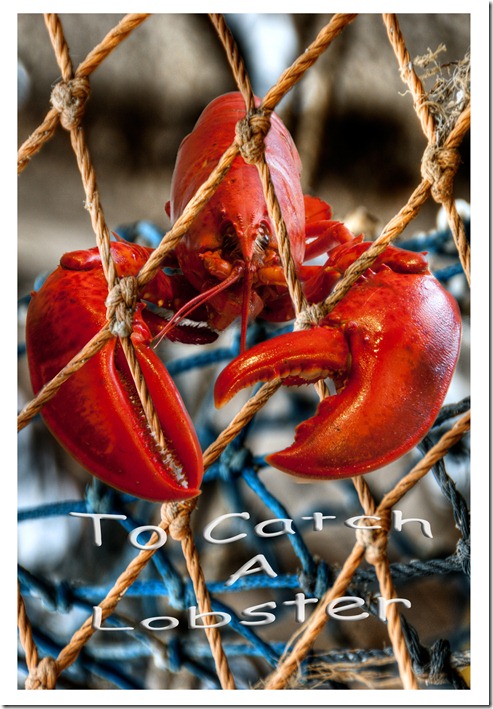
To Catch A Lobster

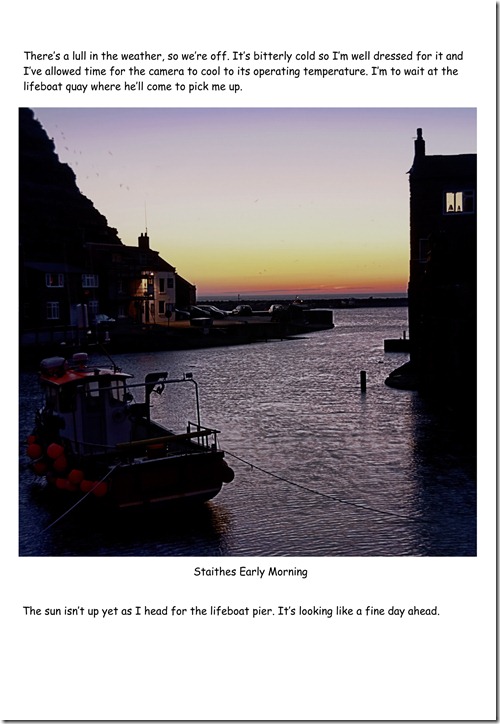
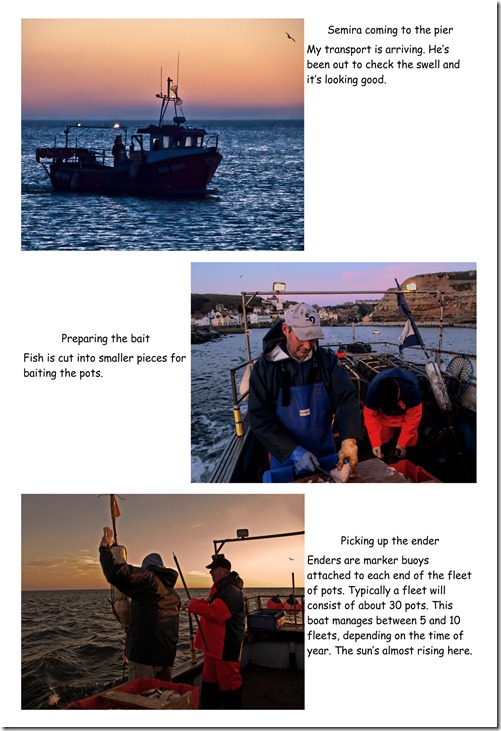
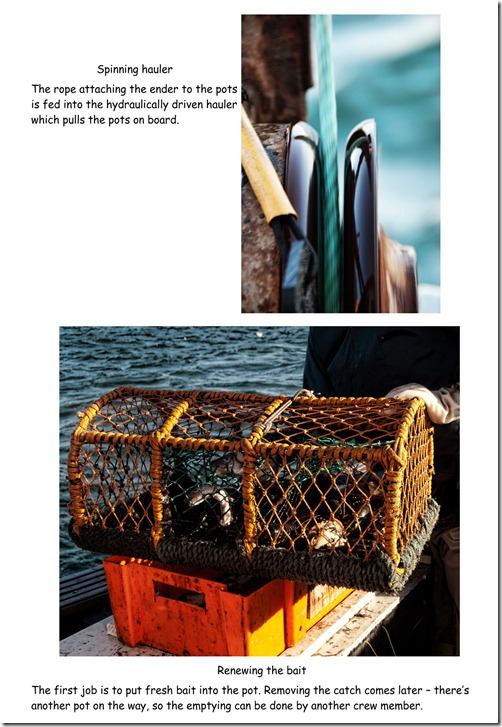
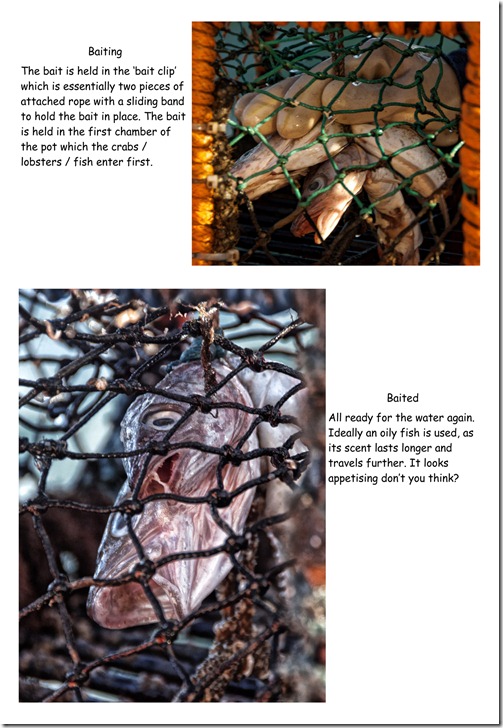
This is a story of inshore fishing on the North Yorkshire coast. It’s about the equipment and the process of

catching a lobster. I’ve asked a friend, from the village of Staithes, to allow me to go to sea with him to photograph a morning’s fishing. I know I’ll be restricted to the boat cabin’s doorway for taking images as they work the pots, but I’m hopeful that I’ll get a good set of images.

In preparation I’ll get images around the harbour, of the things we need:

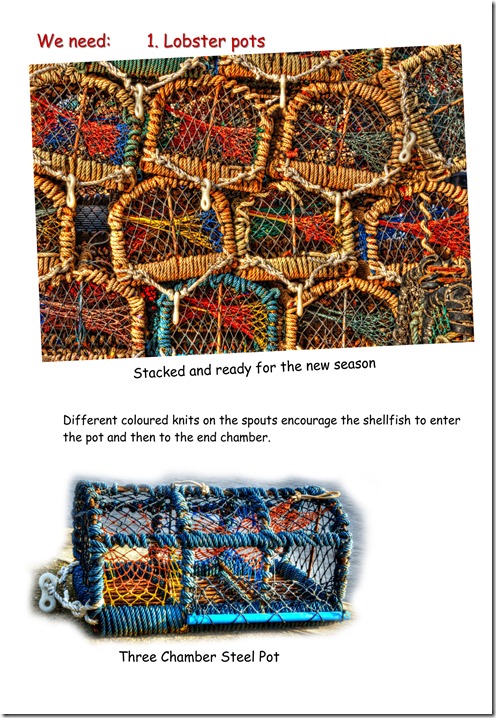
· Lobster Pots

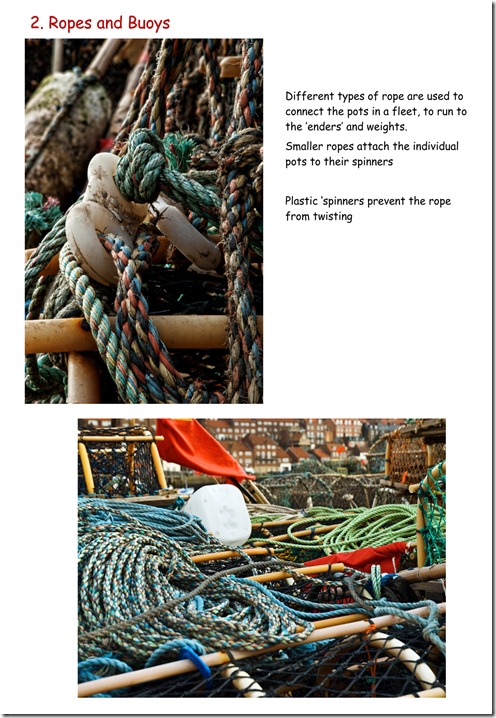
· Rope and buoys

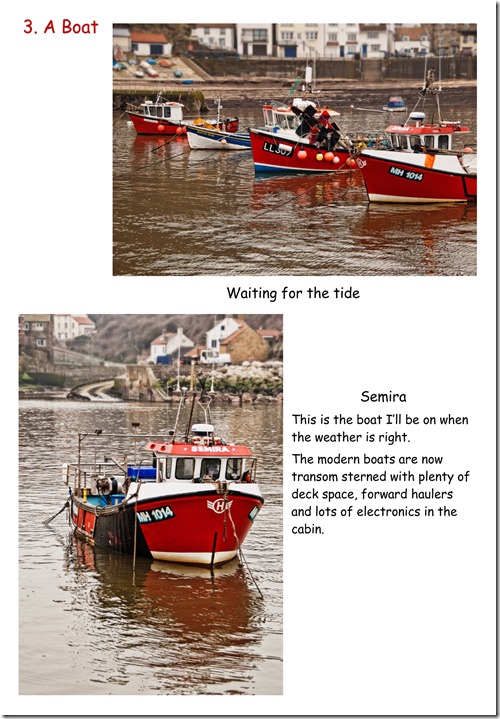
· Boats

Assignment 5 Front Cover

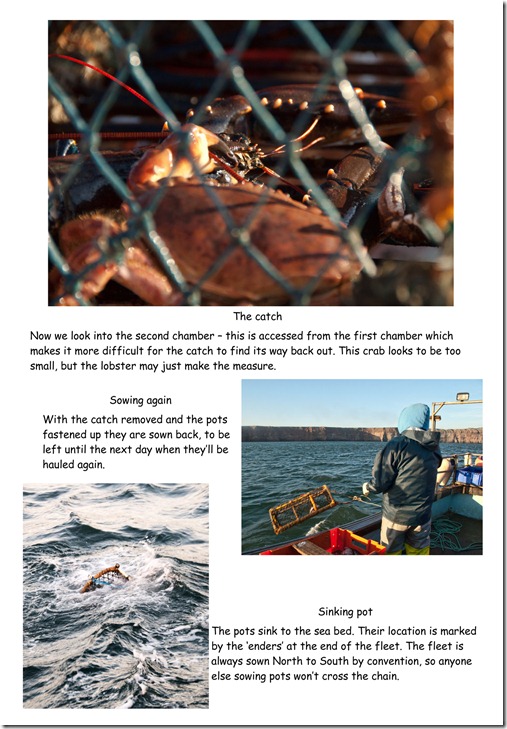
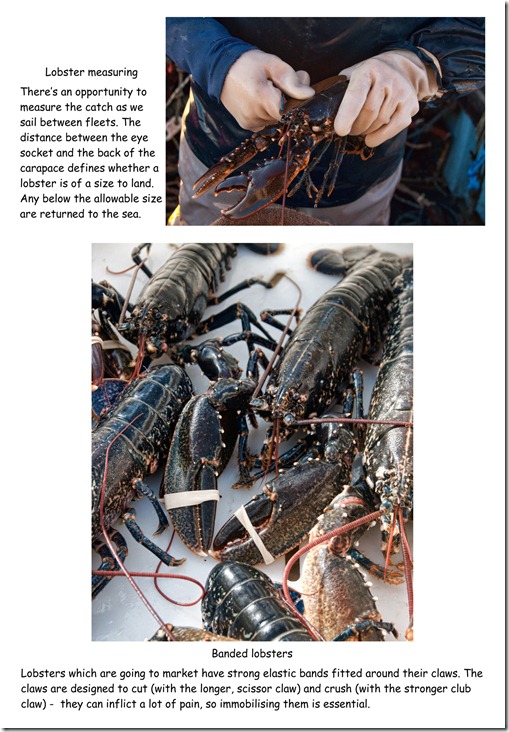
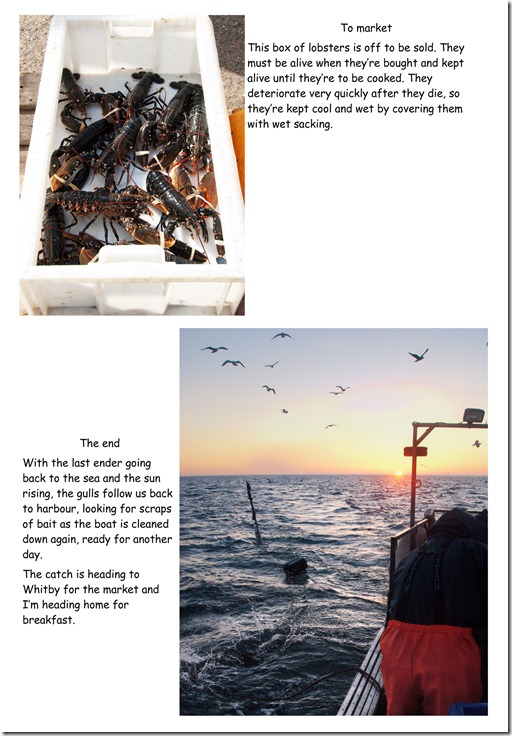
Assignment 5 Page 01

Assignment 5 Page 02

Assignment 5 Page 03

Assignment 5 Page 04

Assignment 5 Page 05

Assignment 5 Page 06

Assignment 5 Page 07

Assignment 5 Page 08

Assignment 5 Page 09

Assignment 5 Page 10

Assignment 5 Page 11

Other studies in Narrative:

Annie Liebowitz:

Her photography creates a story within an image – the main subject of the composition is framed by items which makes the viewer wonder what, how and why things are going on in the picture. Taking it a step further, in her latest exhibition – Pilgrimage – these single images have been combined in a series of pictures to create a narrative of the development of modern history. She allowed her imagination and intuition to lead her on logical steps from one situation to another, for example a visit to the studio of the sculptor of the seated statue at the Lincoln Memorial, led to photographs of the Gettysburg battlefield and artefacts of Lincoln at the Smithsonian. The individual images each tell a story: A pigeon skeleton studied by Charles Darwin leads the viewer to wonder what was learned from the study, what conditions was he working in? What was he looking for? - But the overall presentation is a narrative in itself.

Edward Weston:

Many of his images are illustrative –

His portraits often have the subject placed in surroundings which show what their interests or situations are.

Weston Dave McAlpineDave McAlpin, 1941

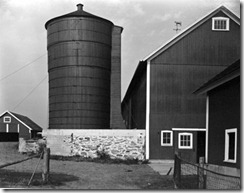
His images of architecture are often juxtaposed to give a sense of place or exaggerate shape / size or define better their purpose.

Connecticut Barn, 1941       Weston Connectiicut Barn, 1941

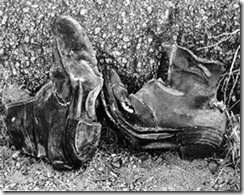
This study of abandoned shoes has a real story to tell:

Weston Abandoned_Shoes_Alabama_HillsAbandoned Shoes – Alabama Hills, 1937

Weston was a photographer with an eye for illustration which keeps the viewer intrigued and interested to find out more about the subject.

Don McCullin:

His images are so illustrative and powerful that they shock the viewer. His work as a war photographer was so graphic and shocking that he was forbidden to photograph the Falklands war, by the government.

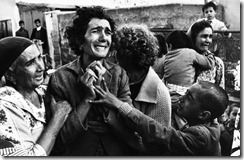
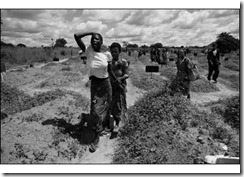
These images are so well taken that the raw feeling of the situations is felt by the viewer:

McCullin Turkish CypriotGrieving Turkish Cypriot woman

Funerals of AIDS victims in ZambiaMcCullin Zambia funeral

McCullin TeresaTeresa – dying of AIDS

This takes illustrative photography to another level. While these bring views of reality to audiences, they impart such strong feelings that the viewer cannot be unaffected by them. Photography when used like this can be so powerful.

His exhibition at the Imperial War Museum – Shaped By War - would be an incredible event to see.

The three photographers studied all use illustrative images, but it distinctly different styles.

· Annie Liebowitz uses the form to group together items which combine to make an interesting image that tells a story – these images may also be used in making narrative essays.

· Edward Weston would position a subject in a situation, or identify items which have an interaction with the main subject. This interaction made the illustration work

· Don McCullin has the rare talent of portraying life (or death) as it is. He carefully frames his images to show the raw sentiments of the subjects which make the illustration shout out – these images would also be used as narratives for the situations he was reporting.

Narrative / Illustrative photography can tell a story, not only in a series of connected events, but also in a single image. The single image often works better than a whole sequence. The use of illustration in an image is an essential to making it work.

Links / books used in studies for this section:

http://americanart.si.edu/exhibitions/archive/2012/leibovitz/ - information on the ‘Pilgrimage’ exhibition by Annie Liebowitz.

http://online.wsj.com/article/SB10001424052970204012004577070663442997528.html An article in the Wall Street Journal about Annie Liebowitz.

http://www.edward-weston.com/index.htm - the Edward Weston / Cole Weston family website with many of Edward’s images.

http://www.historytoday.com/blog/2011/10/shaped-war-photographs-don-mccullin Shaped by War: Photographs by Don McCullin. One of many sites praising his work

The History of Photography – Beaumont Newhall

ISBN 0-87070-380-3

The Photographer’s Eye – Michael Freeman

ISBN – 10: 1905814-04-6

Complete Guide to Photography – John Hedgecoe

ISBN 1-84340-119-3

The Focal Encyclopedia of Photography – 4th Edition – Michael R. Peres

ISBN 13: 978-0-240-80740-9

Train Your Gaze – Roswell Angier

ISBN-10: 2-940373-37-X