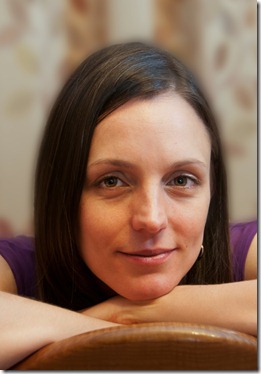
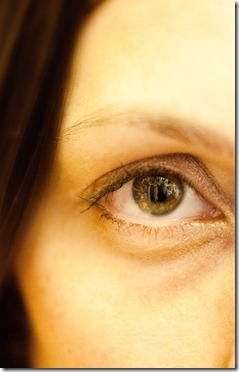
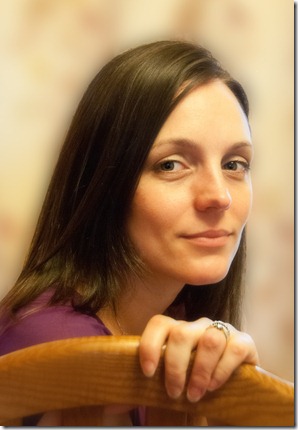
This exercise presented itself earlier than I’d expected due to a visit from our son and daughter in law. I jumped in with not enough planning for the shooting, with obvious results. I think this is still valid for the exercise as the workflow is OK but it shows what needs to be better planned and better prepared.
My workflow plan was as follows:
- Shooting – Plan equipment and an alternative
- Download to computer – Use Lightroom for naming files / folder
- Review images – Delete any images which will not be used.
- Select best images – Use Lightroom ranking system
- Export images to working folder – Rename files from Lightroom
- Process selected images – Use Photoshop for editing
- File finished images – Save / name images to ‘print’ folders from Photoshop
Shooting – I planned to use one of two options:
· In the garden with large shrubs as a backdrop if the weather was good.
· In the dining room with the patio door curtains drawn if the weather was unsuitable for the garden option.
With both options I planned to use fill flash with an additional beauty dish flash unit for side lighting.
Constraints / Techniques:
· Time would be restricted to around 30 minutes as they had to manage their travelling time between baby feeds and sleeping routine.
· I’d talk to Jenny about the purpose of the session and offer her copies of the files and prints if she wished.
· I wanted to try a variety of poses and also use the macro lens for ‘different’ portraits. I’d encourage her to change her expression to give us a better range of images.
· I’d use slow continuous shooting to capture the images while allowing the flash unit to recharge.
· I’d just received a creative lighting accessories kit for my digital flash and a remote wireless control for it – I’d had no time to practice, so it may be a problem, I planned to use both natural and flash lighting to cover both options.
Transferring / examining / selection / processing – I think I’ve got this pretty well covered using Adobe Lightroom for all my imaging imports.
The weather was against us for the garden due to a hard frost, so I drew the curtains over the dining room patio doors, left a chair for her comfort and set up the lighting
I tested the flash remote control and with Jenny’s agreement we went for it.
As we progressed with the shoot, it was obvious that the flash was too strong, so it was angled towards the wall. The majority of the session was completed without flash.
The positioning of the chair was significant, with Jenny feeling much more comfortable with it reversed. As she became more comfortable I changed to single frame shooting as she was more at ease to pose.
The poses we tried with her standing up were interesting. She’s not the tallest girl, but a straight on image made her legs look shorter – taken from a low angle her legs looked significantly longer. On later inspection it was clear that the light from the lounge widow was providing a line of brightness across her legs which made those images useless. This backlighting also made my reflected silhouette obvious in her eyes. That’s a significant thing to watch for.
So the shooting could have been much better planned and the equipment should have been better prepared. I’ve since sorted out the flash, using the CLS in camera to determine the strength of the remote flash, without an additional remote control.
Moving on to the rest of the workflow – this went well:
Transferring the images to the computer I do with the USB cable rather than unseat the memory card unnecessarily.
With the camera USB cable plugged into the computer and using the Lightroom Import dialogue screen, I prefixed the RAW files ‘Jenny’ followed by their original file number. I also used keywords of OCA and DPP. They would be filed in a folder on the external hard drive under the date taken.
The files were imported to Lightroom and copied to one of my external hard drives, under photographs > downloads > 2012. The camera was then disconnected and the memory card reformatted (standard practice).
Three days later and there’s a chance to look at the images using Lightroom. With 55 images to examine I deleted the obviously overblown images and ranked the better images using the star system. The starred images were then exported to the ‘in progress’ folder of the external drive under ‘OCA’ > ‘DPP’ > ‘Part 1’ with the prefix of ‘exercise 01’
This first pass was then further examined to reduce the selections to three, which were then tuned in Photoshop. The RAW images not required were deleted from the hard drive via Lightroom.
The final images were saved in 3 separate folders, as Tiff files, for better printing; High resolution JPEGs for the presentation; and lower resolution JPEGs for use on the blog / e-mailing.
The images produced were:
Apart from the lack of preparation for the shooting, I think the workflow worked pretty well. The fine detail of the work in Lightroom and Photoshop haven’t been mentioned here, but obviously Lightroom can be used for a great deal of the processing, before images are exported to the ‘in progress’ folder, if required.
For me, the main thing to learn from this exercise is that the planning and preparation for the shooting should be much better, taking into consideration things like:
· Getting conversant with equipment before it’s used
· Checking out where light may impinge on the set
· Avoiding my own reflection in the images.
It was also evident that Jenny got more relaxed as the session progressed, so it would be advantageous have extra time to put the model at ease and / or waste a few shots to show that it doesn’t really hurt!
All in all I quite enjoyed this exercise. It’s not a kind of Photography I’ve been comfortable with, but I’m pleasantly surprised by the results.


No comments:
Post a Comment